ShopVPS247.com – Providing genuine cheap VPS
Instructions for connecting Cloud VPS Windows to Windows operating system computer
* How to access Cloud VPS Windows on Windows operating system computer
- First, as usual you must own a VPS before you can access.
- You can buy VPS at Shopvps247.com, you will receive the necessary information for login including IP address, Username and Password.
For example: Cloud VPS 51.79.184.95:21153 , user: Administrator , password: Shopvps247@$%
Instructions for logging into Cloud VPS Windows using a computer with Windows operating system as follows:
Step 1: Activate the Remote Desktop Connection feature
- To log in to VPS using a computer with Windows operating system , you need the support of Remote Desktop Connection tool .
- Please check the VPS information purchased at Shopvps247.com then open the Remote Desktop Connection tool .
Click “ Start ” (Windows window). In the search box, type “ Remote Desktop Connection ”. Then open this tool.
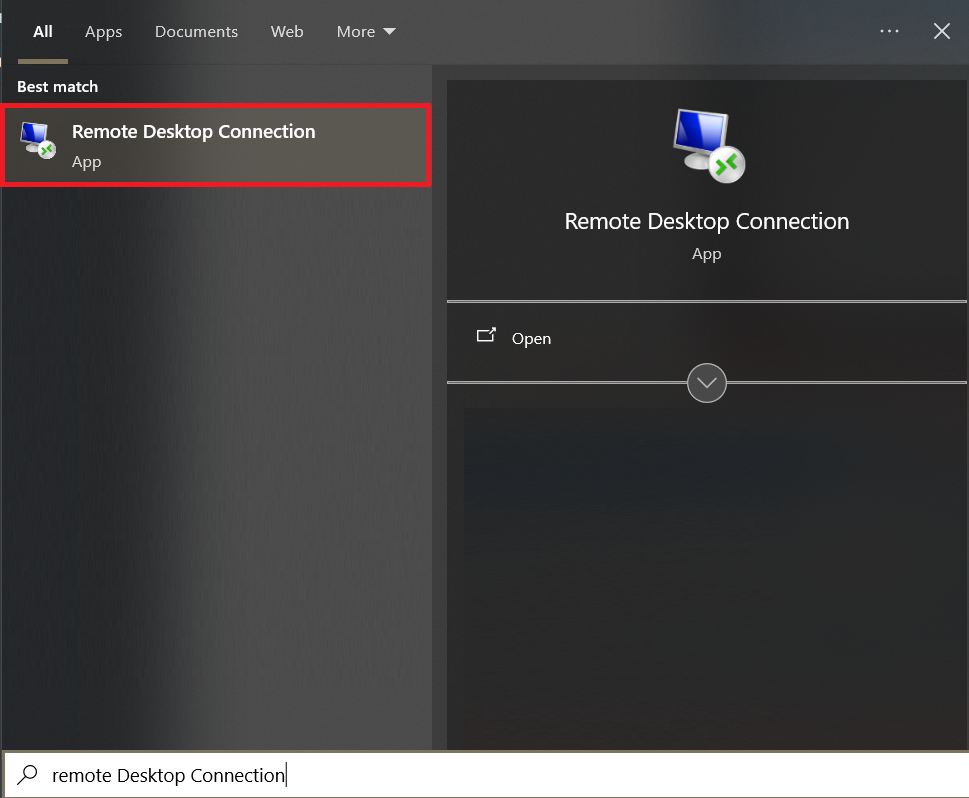
- Immediately you will see the Remote Desktop Connection interface appear as shown below:

* In some cases you may not find “Remote Desktop Connection”
- Follow these steps to find and open the tool:
Click Start → Run → Mstsc.exe
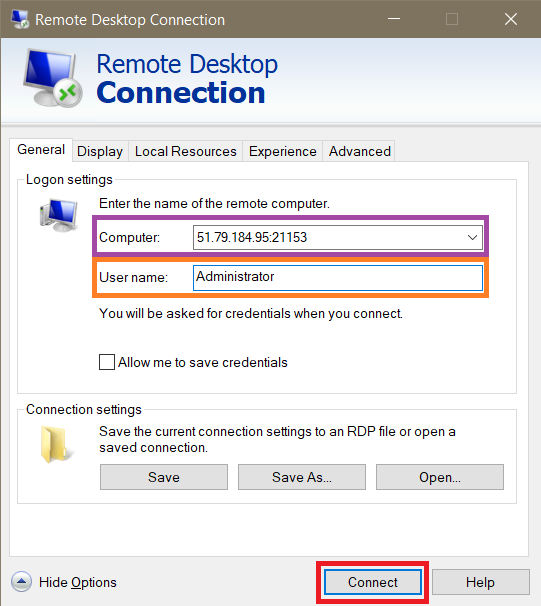
Step 2: Enter VPS information into the Remote Desktop Connection tool
- Please enter the VPS address information (IP:Port format) in the “ Computer ” box.
- Enter user : Administrator in the “ User name ” box
- Next, click on “ Connect ”.
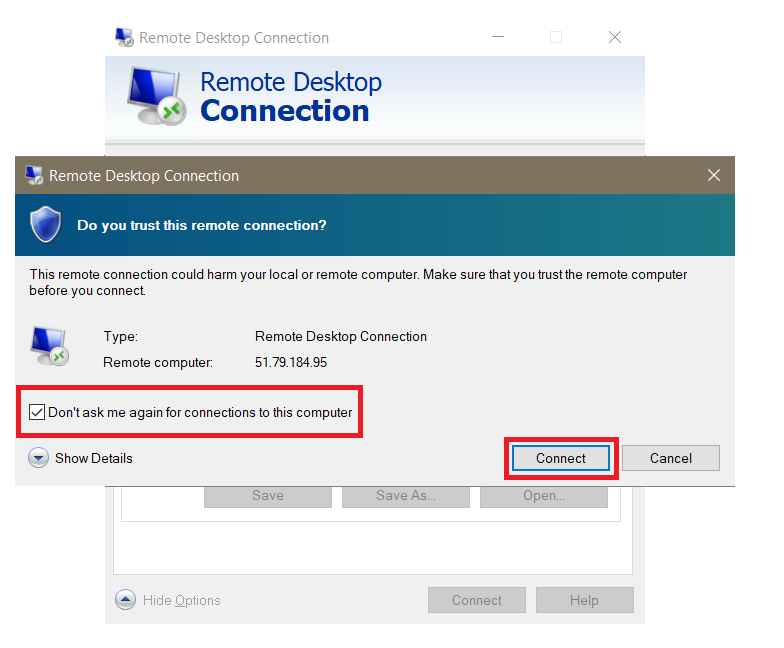
- After clicking “ Connect ” you will see a dialog box open. The dialog box with the content “ Do you trust this connection? ”.
- Then you just need to click on the box " Don't ask me again… ".
- Then, click “ Connect ”.
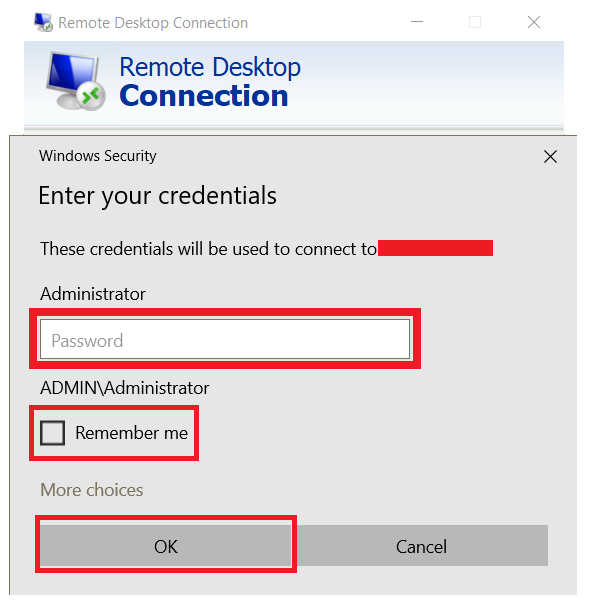
- Next, the Remote Desktop Connection tool will notify the successful VPS connection by displaying the “ Windows Security ” login window.
- The first of which is a window asking for a password.
- Please enter Password : Shopvps247@$% in the " Password " box
- If you want to save your password , click “ Remember me ”
- Then, click “ OK ”
* Note:
- If your computer uses Windows 2008 and 2012 , enter the password in the " Administrator " section. If it is Windows 7, 8, 10 , enter the password in the " Admin " section.
- In addition, depending on the Windows version , the dialog box below will appear differently.
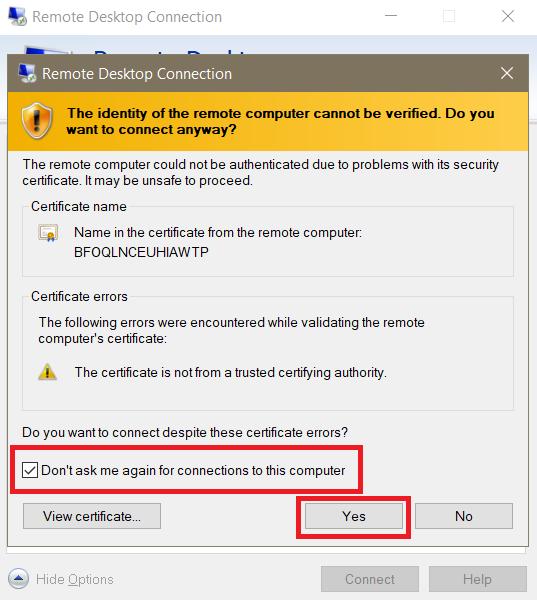
Step 3 : Proceed to security confirmation
- Normally after completing the operations in step 2, the successful VPS login interface does not appear .
- Instead, the VPS system will send a new message asking for security confirmation.
- A dialog box will appear with a yellow warning saying “ The identity of the remote computer…. ”.
- Click on the box “Don't ask me again for connections to this computer”
- Then, click “ Yes ”
* The process of logging into VPS windows using a computer with windows operating system is successful.
Thank you for using the service at Shopvps247.com!